Creating and managing pods
At the core of Kubernetes is the Pod. Pods represent a logical application and hold a collection of one or more containers and volumes running on the same node. In this chapter you will learn how to:
-
Write a Pod configuration file
-
Create and inspect Pods
-
Interact with Pods remotely using kubectl
In this chapter you will create a Pod named monolith and interact with it using the kubectl command line tool.
Tutorial: Creating Pods
Let’s look at configuration file used to create Kubernetes resources. To see files on your free instance, Cloud Shell provides a code editor. Open it using the pencil button

Now explore the monolith pod configuration file in kubernetes-istio-workshop/manifests/app/pods/monolith.yaml
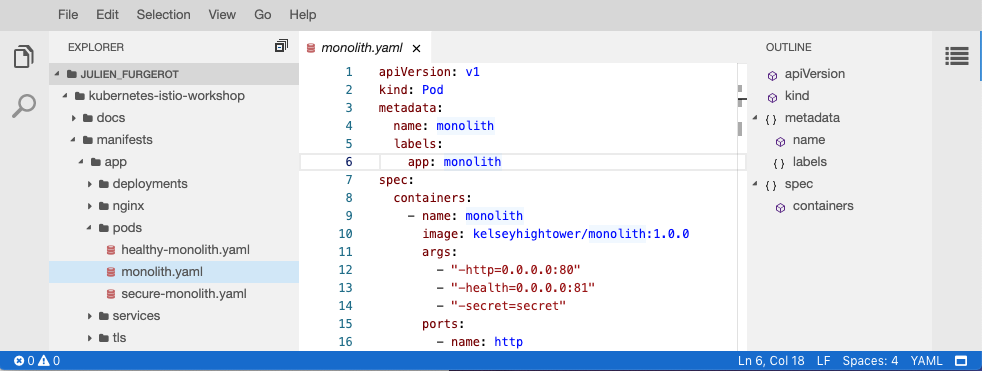
Notice some important parts of this Pod definition:
-
you can have more than one container per pod
-
each container have its own image and arguments, and can declare which ports its listen to
-
you should define requests and limits for your container
-
requests specifies minimal resources required by you application
-
limits will protect your cluster for uncontrolled resource consumption by containers
-
To deploy the monolith pod, use kubectl to apply your pod definition on the cluster :
kubectl apply -f manifests/app/pods/monolith.yamlExercise: View Pod details
Use the kubectl get and kubect describe commands to view details for the monolith Pod.
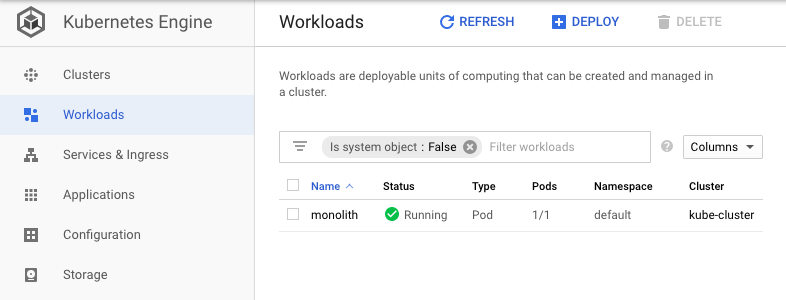
You can also navigate on the Workloads menu in GCP console
Exercise: Interact with a Pod remotely
Pods are allocated a private IP address by default and cannot be reached outside of the cluster. Use the kubectl port-forward command to map a local port to a port inside the monolith pod.
Hints
Use two Cloud Shell terminals. One to run the kubectl port-forward command, and the other to issue curl commands.
kubectl port-forward monolith 10080:80curl http://127.0.0.1:10080
curl http://127.0.0.1:10080/secure
TOKEN=$( curl -s -u user:password http://127.0.0.1:10080/login | jq -r .token )
curl -H "Authorization: Bearer ${TOKEN}" http://127.0.0.1:10080/secureExercise: View the logs of a Pod
Use the kubectl logs command to view the logs for the monolith Pod:
kubectl logs monolithUse the -f flag and observe what happens.
Bonus: download and use stern for logs
Stern (https://github.com/wercker/stern) is a small go binary which allow to follow logs from multiple pods by pod-name patterns.
Download it from github and make it executable
curl -L -o stern https://github.com/wercker/stern/releases/download/1.11.0/stern_linux_amd64
chmod +x stern
Then you can get logs from pods by pattern:
./stern monoli*