Getting started with Kubernetes
Summary
Kubernetes is all about applications and in this section you will utilize the Kubernetes API to deploy, manage, and upgrade applications. In this part of the workshop you will use an example application called "app" to complete the chapters.
App is hosted on GitHub and provides an example 12 Facter application. During this workshop you will be working with the following Docker images:
-
kelseyhightower/monolith - Monolith includes auth and hello services.
-
kelseyhightower/auth - Auth microservice. Generates JWT tokens for authenticated users.
-
kelseyhightower/hello - Hello microservice. Greets authenticated users.
-
nginx - Frontend to the auth and hello services.
Create Kubernetes cluster on GKE
You’ll create a Kubernetes cluster using Google Kubernetes Engine (GKE) web UI.
Click the 3 bar menu - aka. the Burger - on the upper-left corner of the GCP Console.
When you mouse over the menu item Kubernetes Engine, a pin appear on the right. Click it to pin Kubernetes Engine on top of the menu. You can do the same with Compute Engine and Container Registry.
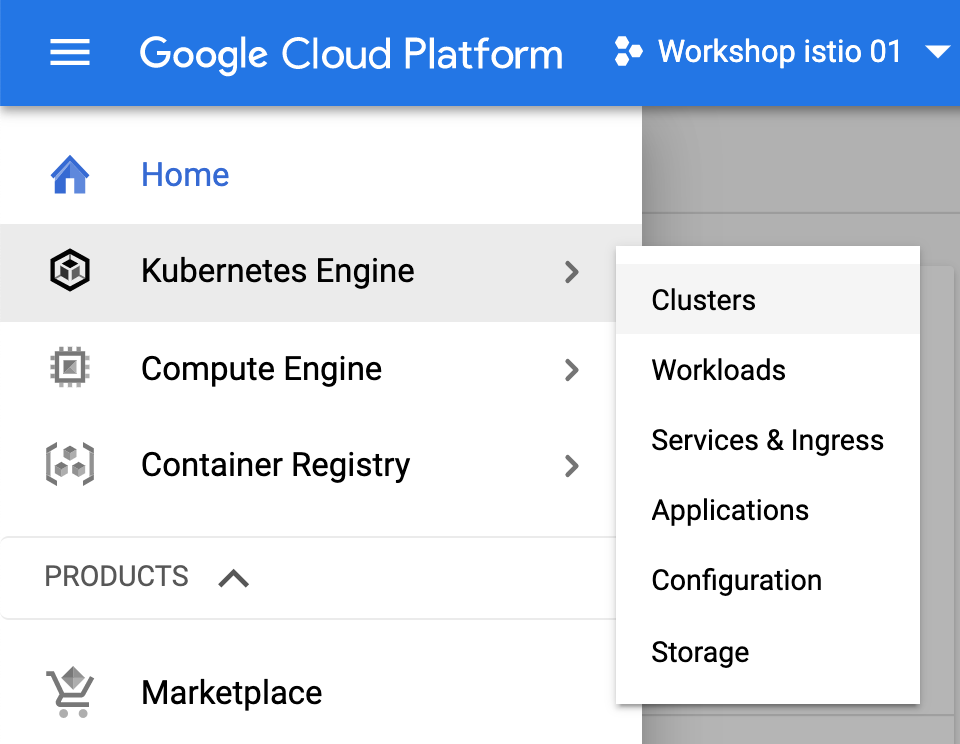
Then click on Kubernetes Engine to open the list of GKE clusters.
You don’t have any cluster now. Click the Create cluster button to open the cluster creation wizard.
On the left column, choose the cluster template named "Standard cluster".
On the right part of the wizard:
-
Give your cluster the name kube-cluster
-
Let
Zonalfor the Location type -
Choose
europe-west1-bas Zone for this cluster (to have it close to the user) -
Let the default value for the master version
-
In the default-pool, keep 3 nodes but choose
n1-standard-2as machine type -
Click the Create button to create the cluster
⏳ Wait until the cluster is fully started. It should takes 2-3 minutes.
You can also follow cluster creation from the Cloud Shell
gcloud container clusters listYou should see your cluster with some details
NAME          LOCATION        MASTER_VERSION  MASTER_IP      MACHINE_TYPE   NODE_VERSION   NUM_NODES  STATUS
kube-cluster  europe-west1-b  1.13.10-gke.0   34.65.193.222  n1-standard-2  1.13.10-gke.0  3          PROVISIONING
Run Look at STATUS column which should evolve from PROVISIONING to RUNNING
NAME          LOCATION        MASTER_VERSION  MASTER_IP      MACHINE_TYPE   NODE_VERSION   NUM_NODES  STATUS
kube-cluster  europe-west1-b  1.13.10-gke.0   34.65.193.222  n1-standard-2  1.13.10-gke.0  3          RUNNING
Configure Kubernetes command-line client
kubectl is the command-line client for Kubernetes. It’s a user interface calling the Kubernetes REST API’s on the Master IP address.
You can verify the API with curl, replace [MASTER_IP] by the MASTER_IP of your cluster above
curl -k https://[MASTER_IP]/On Google Kubernetes Engine (GKE), the master API is authenticated and reject anonymous connections with HTTP code 403:
{
    "kind": "Status",
    "apiVersion": "v1",
    "metadata": { },
    "status": "Failure",
    "message": "forbidden: User \"system:anonymous\" cannot get path \"/\"",
    "reason": "Forbidden",
    "details": {},
    "code": 403
}
To call the master API, you’ll create a configuration for kubectl on your Cloud Shell.
gcloud container clusters get-credentials kube-cluster --zone=europe-west1-bYou can now list the nodes composing your cluster and see what is running inside it
kubectl get nodes
kubectl get all
You have 3 nodes and a single service running in Kubernetes.
This service/kubernetes resource is a service exposing the REST API of your Kubernetes cluster to the Pods, allowing them to execute kubectl commands if they want to (very few applications do that) or call API programmatically (it’s more common).
You can also load kubectl auto-competion for current bash shell
source <(kubectl completion bash)You have to do it on each new shell or add it on your bash profile.
That way, you’ll be able to list kubectl commands and arguments with :
kubectl <Tab><Tab>or
kubectl get p<Tab><Tab>